Alpine Touring Boots Should Make Your Feet Happy
Alpine Touring Boots Should Make Your Feet Happy
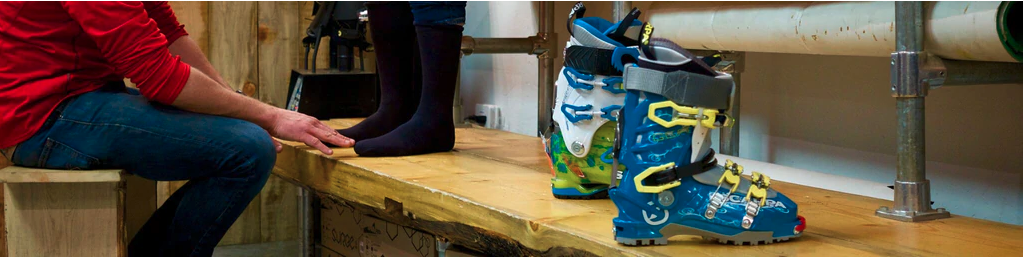
On an average day ski touring, you spend 90% of your day going uphill and the other 10% is spent skiing downhill, but 100% of that time is in your ski boots. As you ascend through beautiful glades or up a summit ridge, your feet tend to swell. The rhythmic motion of touring has a tendency to localize friction and rubbing, maybe causing hot spots or blisters. Touring boots are all a derivative of plastic, so needless to say they do not breathe well. At least it's cold out so that your swollen, friction-worn, sweaty feet can be rendered frozen within minutes atop a frigid summit. All of these aspects of ski touring are what we work against when finding the appropriate fit for an alpine touring boot. Below we talk you through the fitting process we use to ensure an accurate and comfortable fit. Fingers crossed we will work our boot fitting magic (there are hundreds of sold boots and happy feet out there that confirm our boot fitting magic works) to get you into the appropriate pair of boots so you can spend days traveling on skis through mountains with both faces and feet smiling.
Steps to Sizing an Alpine Touring Boot
1) Foot Sizing
1) Foot Sizing
The first step in a boot fitting appointment is measuring your feet. Here we are looking at your foot's length and width. Different boots have different widths (AKA the boot's last) and that's just as important as matching the length. We'll ask what kind of ski touring you're looking to do (for more on types of touring, look here). Then we'll grab a few options to hone in your final boot selection.
Set up an appointment with us to chat about gear.
BOOK NOW
2) Shell Fit
With each boot you try on, we’ll perform a shell fit. You put your socked foot into the shell, bring your toes to the front of the boot, and then check the amount of space in between your heel and the shell of the boot. We are looking for 1-2 fingers of space in between your heel and the shell. Those that prefer a more alpine style fit will want closer to 1 finger of space. This tightness provides a boost in responsiveness on the downhill, but will also limit circulation and cause colder feet. A 2 finger fit is a relaxed fit. You will not feel as responsive in the boot, but will have more all-day comfort. Too tight of a boot and you'll have severe pain from pinched nerves and cold toes, too loose of a boot and you'll have blisters from rubbing and a lack of performance. For most people (regardless of ski ability), 1.5 fingers is the sweet spot metric for an appropriate alpine touring boot shell fit as a happy medium between performance and comfort.
3) Liner Fit
After confirming the shell, it's time to try on the boots! When buckling up the boots start with the top buckles and work your way down. This helps to set your heel and then the rest of your foot into the proper position in the boot. Don't feel it necessary to crank down the lower buckles- you should easily be able to close them with one finger. If you over tighten these buckles you can cut off circulation on the top of your foot and end up with cold, numb feet. The feeling that you are looking for while buckled into an alpine touring boot is confident comfort. Secure, but nonrestrictive- the feeling of a firm handshake. A great metric for an appropriate fit at this stage is to have your toes gently in contact with the plastic shell of the boot. Then flex your knee to the floor [while keeping your foot flat on the ground] while in ski mode. If your toes ever-so-slightly pull away from the plastic shell while flexing, that is a well-fit touring boot.
4) Ski Mode and Walk Mode
Now the fun part, switch the boot into walk mode and walk around the shop. How does it feel? Don't be concerned with minor pressure points here or there. Those will come out with a heat mold of the liner. What you're really looking for are major pressure points or any spots you know you couldn't handle if you had to be in the boots for a couple of hours. If there are spots you know would be uncomfortable, try on different boots until you find one that is pretty comfortable right out of the box. For some really wide feet or bunions, go with the boot that is the most comfortable right out of the box and we will correct the rest during a heat mold of the liner and/or with a punch of the boot's shell.
Often we recommend once you find a boot that is comfortable to go out and ski it a couple of times. First, if the boot does need additional fitting work, you will have a much better idea where problem areas are after doing the real deal versus walking around the shop. Second, you may not need a heat mold at all and will get a little longer life out of the liner by not heat molding with certain liners. The thicker the liner the more it can change through a heat mold. Thin rando race liners generally do not change much during a mold, therefore make sure it is big enough out of the box.
5) Footbeds
Lastly, footbeds. All boots will come with generic footbeds. These have close to no shape or arch support and for many skiers that is fine. We strongly recommend either a supportive drop-in footbed or a custom Sidas footbed meticulously crafted at our Denver location. Footbeds also make most feet properly fill the volume of a ski boot as they were designed. The longer you spend in ski boots, the more we recommend footbeds, because the more we are standing on our feet without arch support, the more our arch will start to collapse inward - causing foot pain and a slew of other related injuries. Most skiers do not have perfect feet and require at minimum a low arch drop in footbed.
6) Final Step!
It's time to schedule an appointment with one of our expert bootfitters and get your new touring boots!